
How to Sign a Word Document
7 min read
There are five ways to electronically sign a Word document; using Word’s built-in features like signature line and drawing, or using an eSignature platform like fynk. The following guide will walk you through the all posible ways — including the easiest way — to add an electronic signature to a Word document.
Table of contents
- 5 Methods to Add a Signature to a Word Document
- Method 1: Word Signature Line Feature (Difficult, Advanced)
- Method 2: Drawing a Signature in Word (Easy, Basic)
- Method 3: Add an Image of Your Signature to Word (Easy, Basic)
- Method 4: Type Your Name Using Stylish Fonts (Easy, Basic)
- Method 5: Using an eSignature Platform (Easy, Advanced)
- Now Over to You
5 Methods to Add a Signature to a Word Document
There are five ways to electronically sign a Microsoft Word document:
- Method 1: Word Signature Line Feature (Difficult, Advanced)
- Method 2: Drawing a Signature in Word (Easy, Basic)
- Method 3: Add an Image of Your Signature to Word (Easy, Basic)
- Method 4: Type Your Name Using Stylish Fonts (Easy, Basic)
- Method 5: Using an eSignature Platform (Easiest, Advanced)
📌 Remember: If you want to securely sign your Word document using legally effective eSignatures that comply with regulations, we highly suggest using an eSignature platforms like fynk that offer Advanced and Qualified Electronic Signatures.
Sign
any
Document in Less than
a Minute.

Method 1: Word Signature Line Feature (Difficult, Advanced)
Guide: Windows
- Go to “Insert” and select “Signature Line” on the right side of the toolbar, in the Text group.


- Fill out the fields in the Signature Setup dialog box and click “OK.”
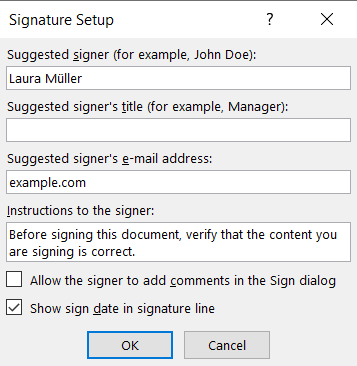

A field similar to this will be added to your doc:


📌 Remember: If you decide to edit any part of your document after signing, Word would remove your eSignature and you have to do all the steps again.
Before you can add a signature on Word, you have to save the document in a format that supports digital signatures.
After inserting a signature line in Microsoft Word, you’ll be prompted to select a Digital ID from a trusted Microsoft Partner before signing the document.
To get that, a fee is typically required to use Microsoft Word’s partner services.
To sign a Word document without an official certificate, you can create your own certificate following the guide on obtaining a digital certificate.
❗ Important: If you are in the Europe, make sure these providers are comply with eIDAS, which is the governing regulation for electronic signatures in EU.
- Double-click the signature line to open the “Sign” pop-up.
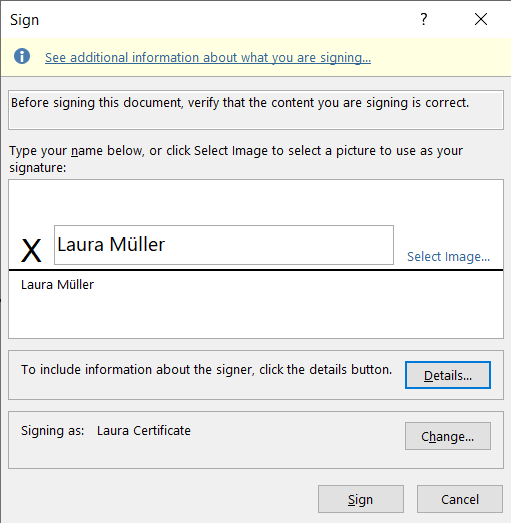

- Click on “Select Image” to insert an image of your handwritten signature.
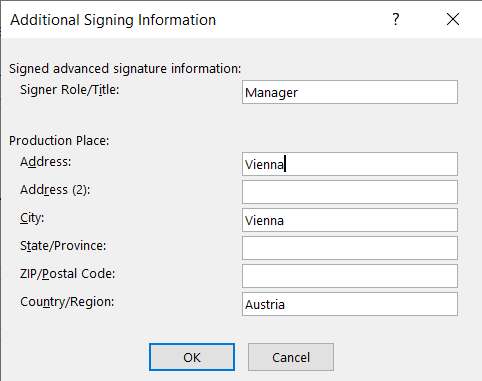
- Click on “Details…” to add additional signing information such as your address and title.

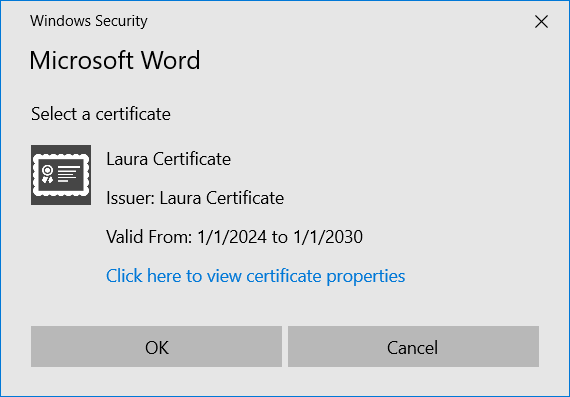
- If you have multiple certificates or the displayed certificate isn’t yours, click “Change” to select the correct signer:

- Finally, check the boxes at the bottom “Allow the signer to…” and “Show sign date…” if necessary, then click OK.
Your electronic signature in Microsoft Word will look like this: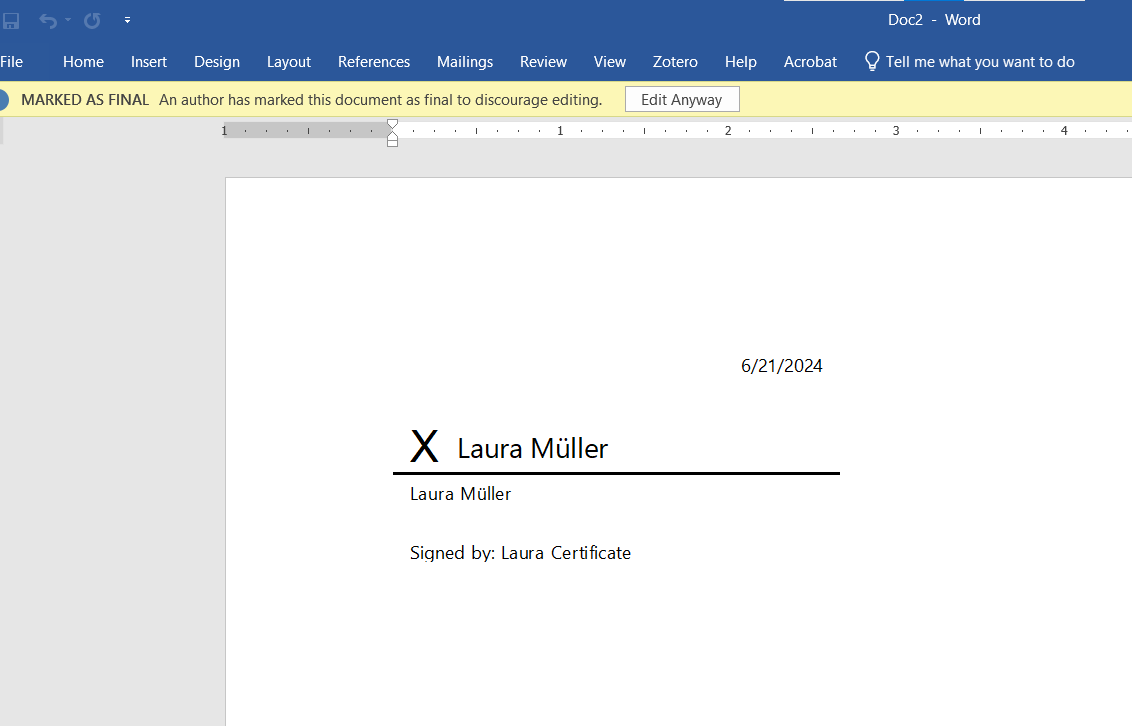
Guide: Mac
There’s no “Signature Line” option for Mac users. So, you cannot electronically sign directly using the “Signature Line” option. Instead, you may use one of the options mentioned in the following for creating simple signatures.
❗Important: If the document was signed with a digital signature in the Windows version of Word, you might not be able to view it in the Mac version.
Assessment
The Pros and Cons of Signing Using Microsoft Word are:
Pros
- ✅ Ability to create both simple signatures and advanced signatures (certified by a CA)
Cons
- ❌ Lack of legal recognition
- ❌ Limited certificate provider for advanced signatures
- ❌ The certified electronic signature is not free
- ❌ Complicated process for inserting certified signatures
- ❌ Limited features for Mac users
- ❌ Compatibility issues when using different versions of Word
Method 2: Drawing a Signature in Word (Easy, Basic)
Only use this method when you want to sign a Word document that is not highly sensitive or important.
Guide: Windows
- Go to the “Insert” tab and click on “Shapes.”
- Choose the “Scribble” tool to draw your signature with your mouse or trackpad.
- Move your signature to wherever you wish.
Guide: Mac
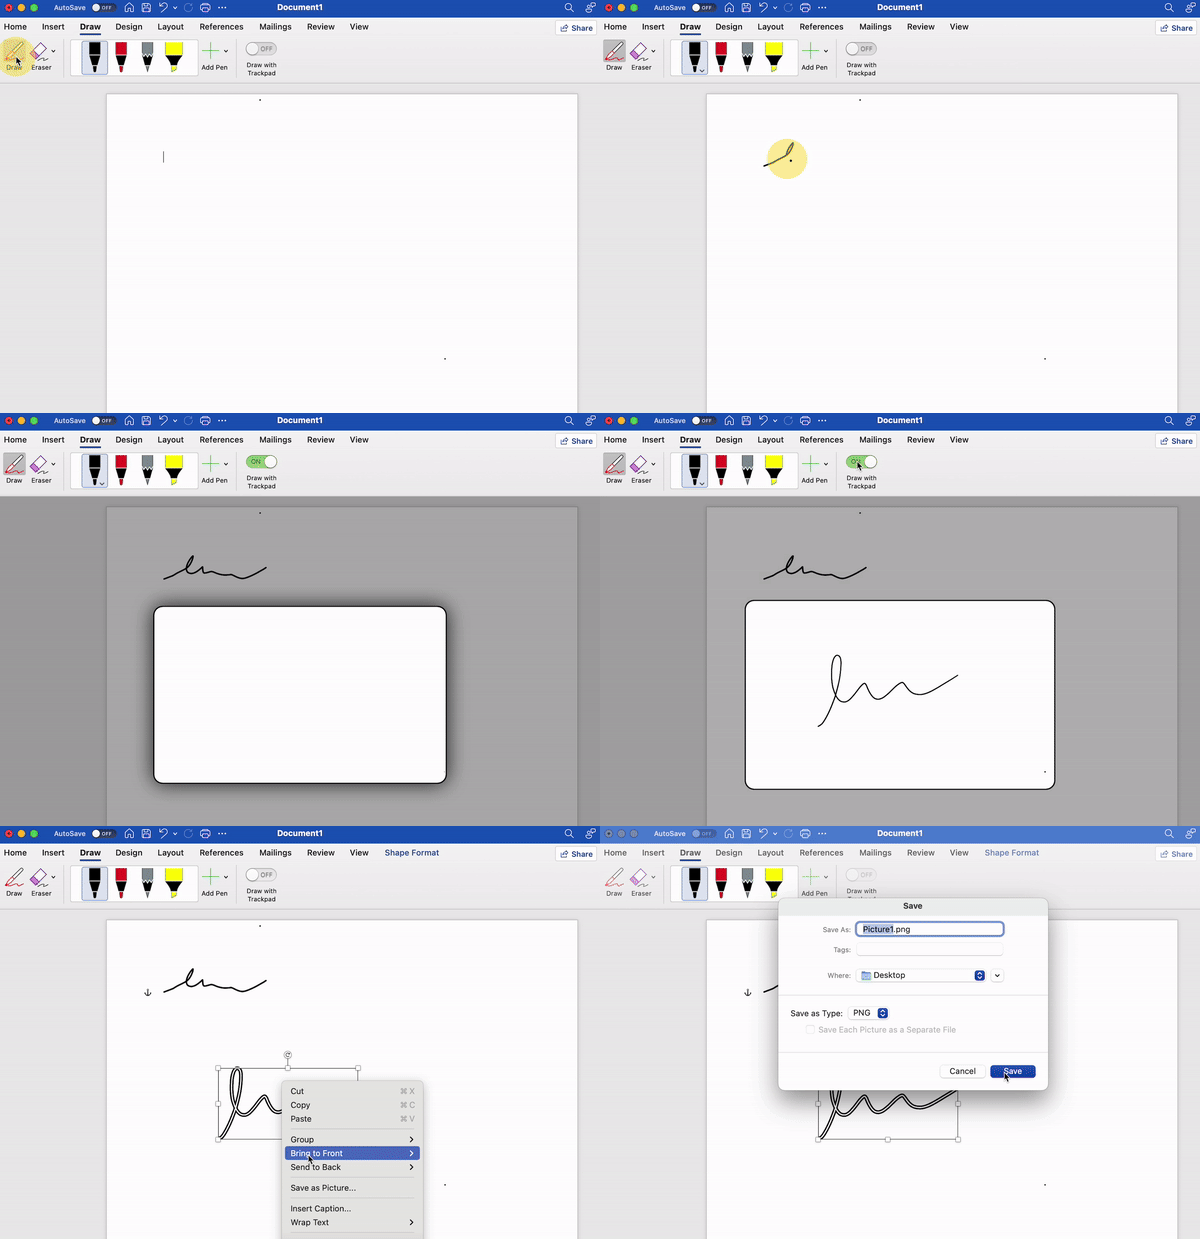
- Open your Word document and go to “Draw” tab.
- Select “Draw” again from the left side.
- Choose your Pen from the box in the toolbar and Draw your signature
- If you want to sign using touchpad, make the “Draw with Trackpad” button on.
- Save your Signature for future use by right clicking on the signature drawing and selecting “Save as Picture…”

Assessment
The Pros and Cons of Drawing Signature in Word are:
Pros
- ✅ Easy to insert
- ✅ Reusable
Cons
- ❌ Lacks security measures
- ❌ Image may need to be resized or repositioned frequently
- ❌ Does not provide any means of verifying the authenticity of the signer.
Method 3: Add an Image of Your Signature to Word (Easy, Basic)
Guide
To insert the image of your wet signature to Word,
- Sign a piece of paper and scan it or take a photo with your smartphone.
- Save the image to your computer in a common image format like JPG or PNG.
- Open your Word document and place the cursor where you want to insert your signature.
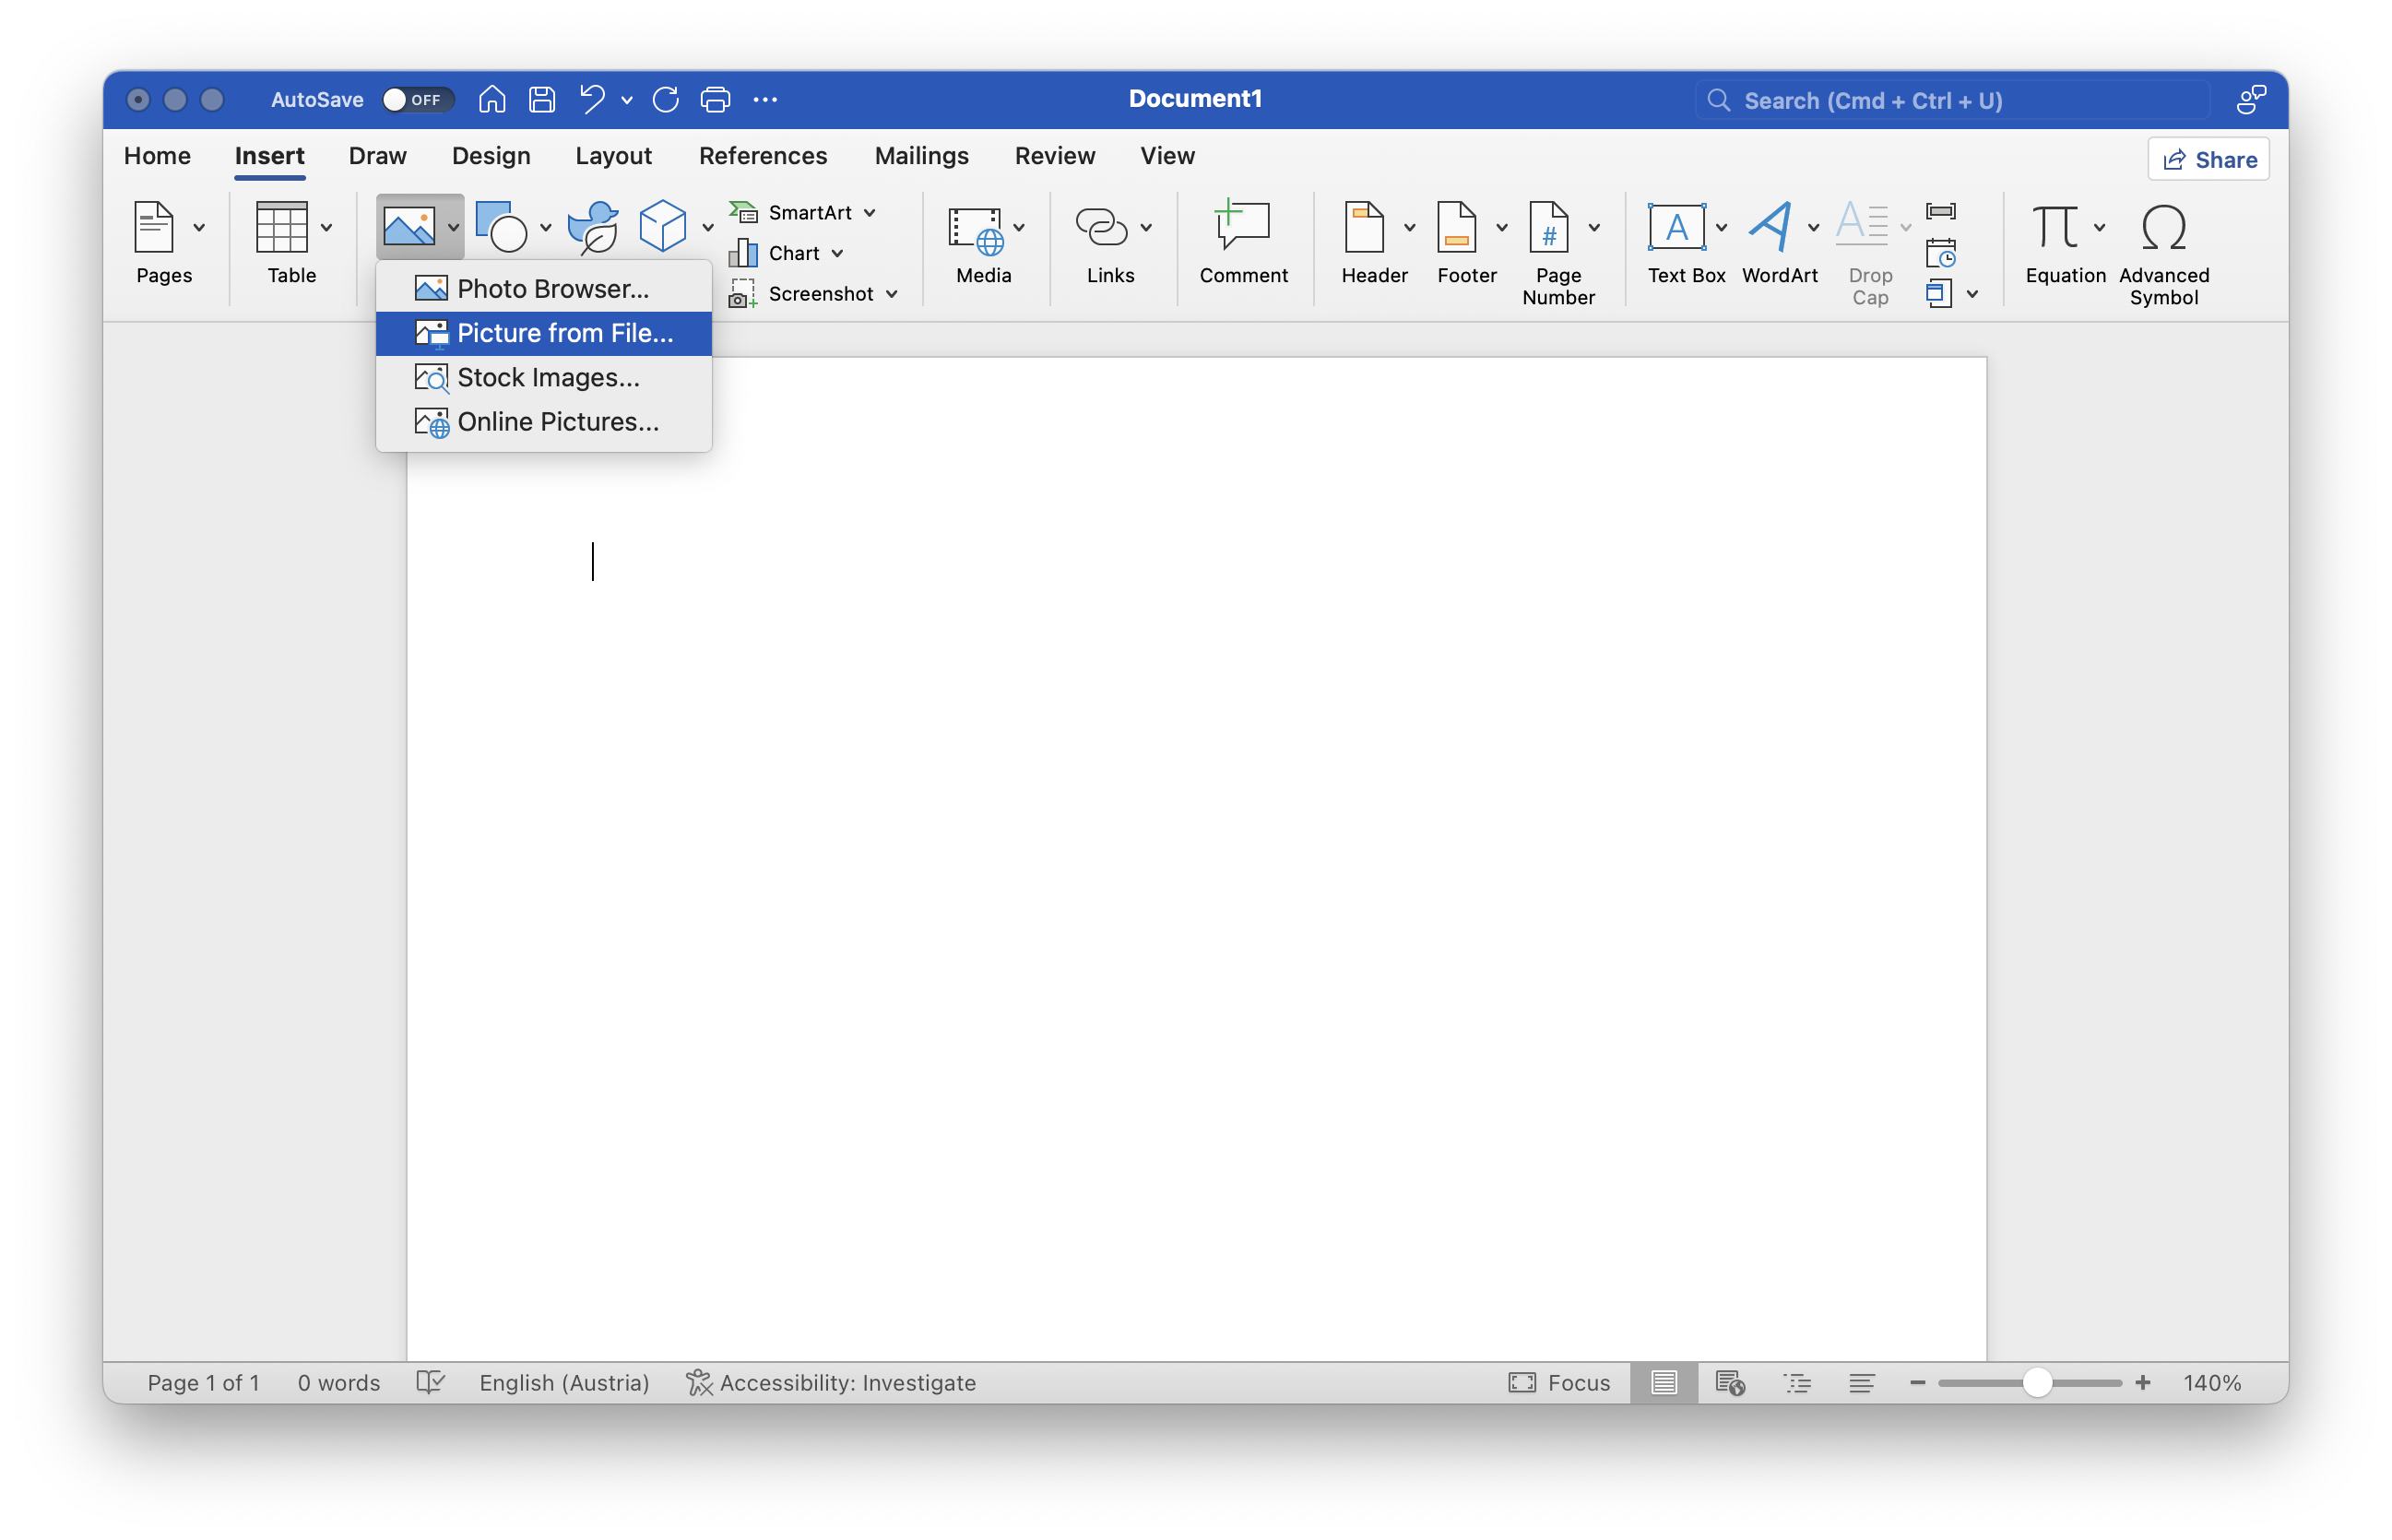
- Go to “Insert” —> “Pictures” and select “Picture from File.”

- Choose your signature file and click “Insert” and use the little squares in the corners to resize your image.
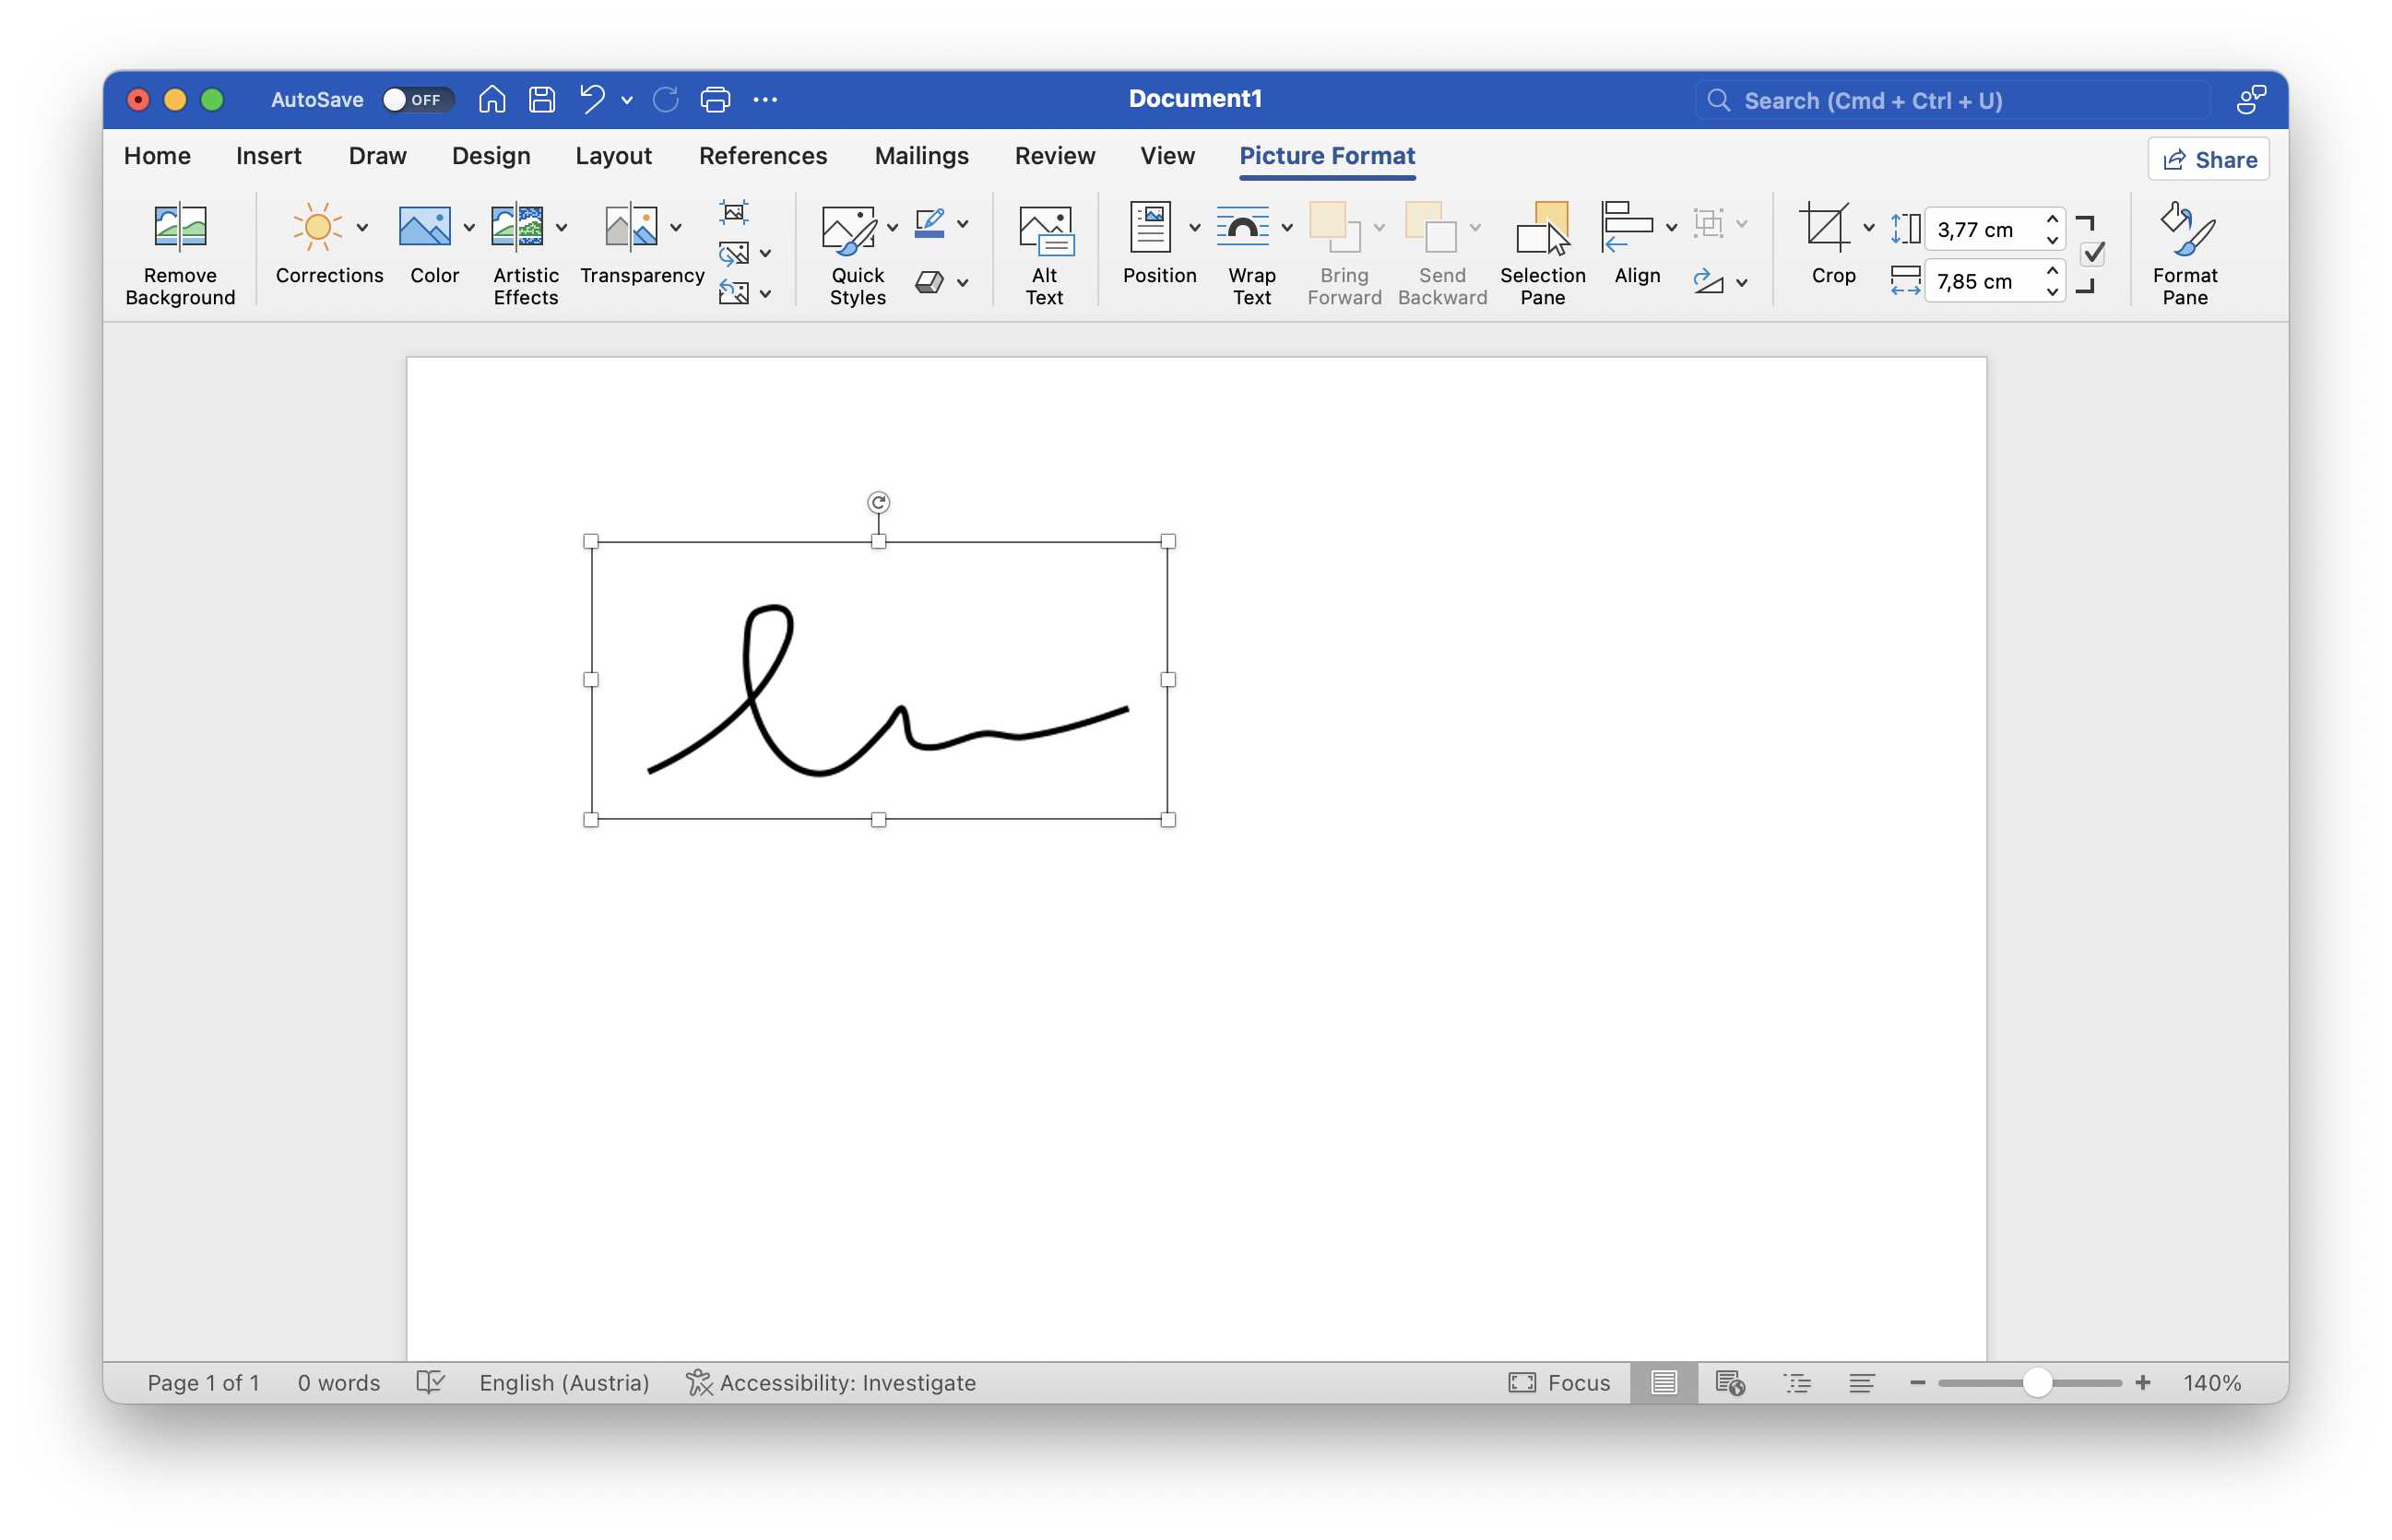

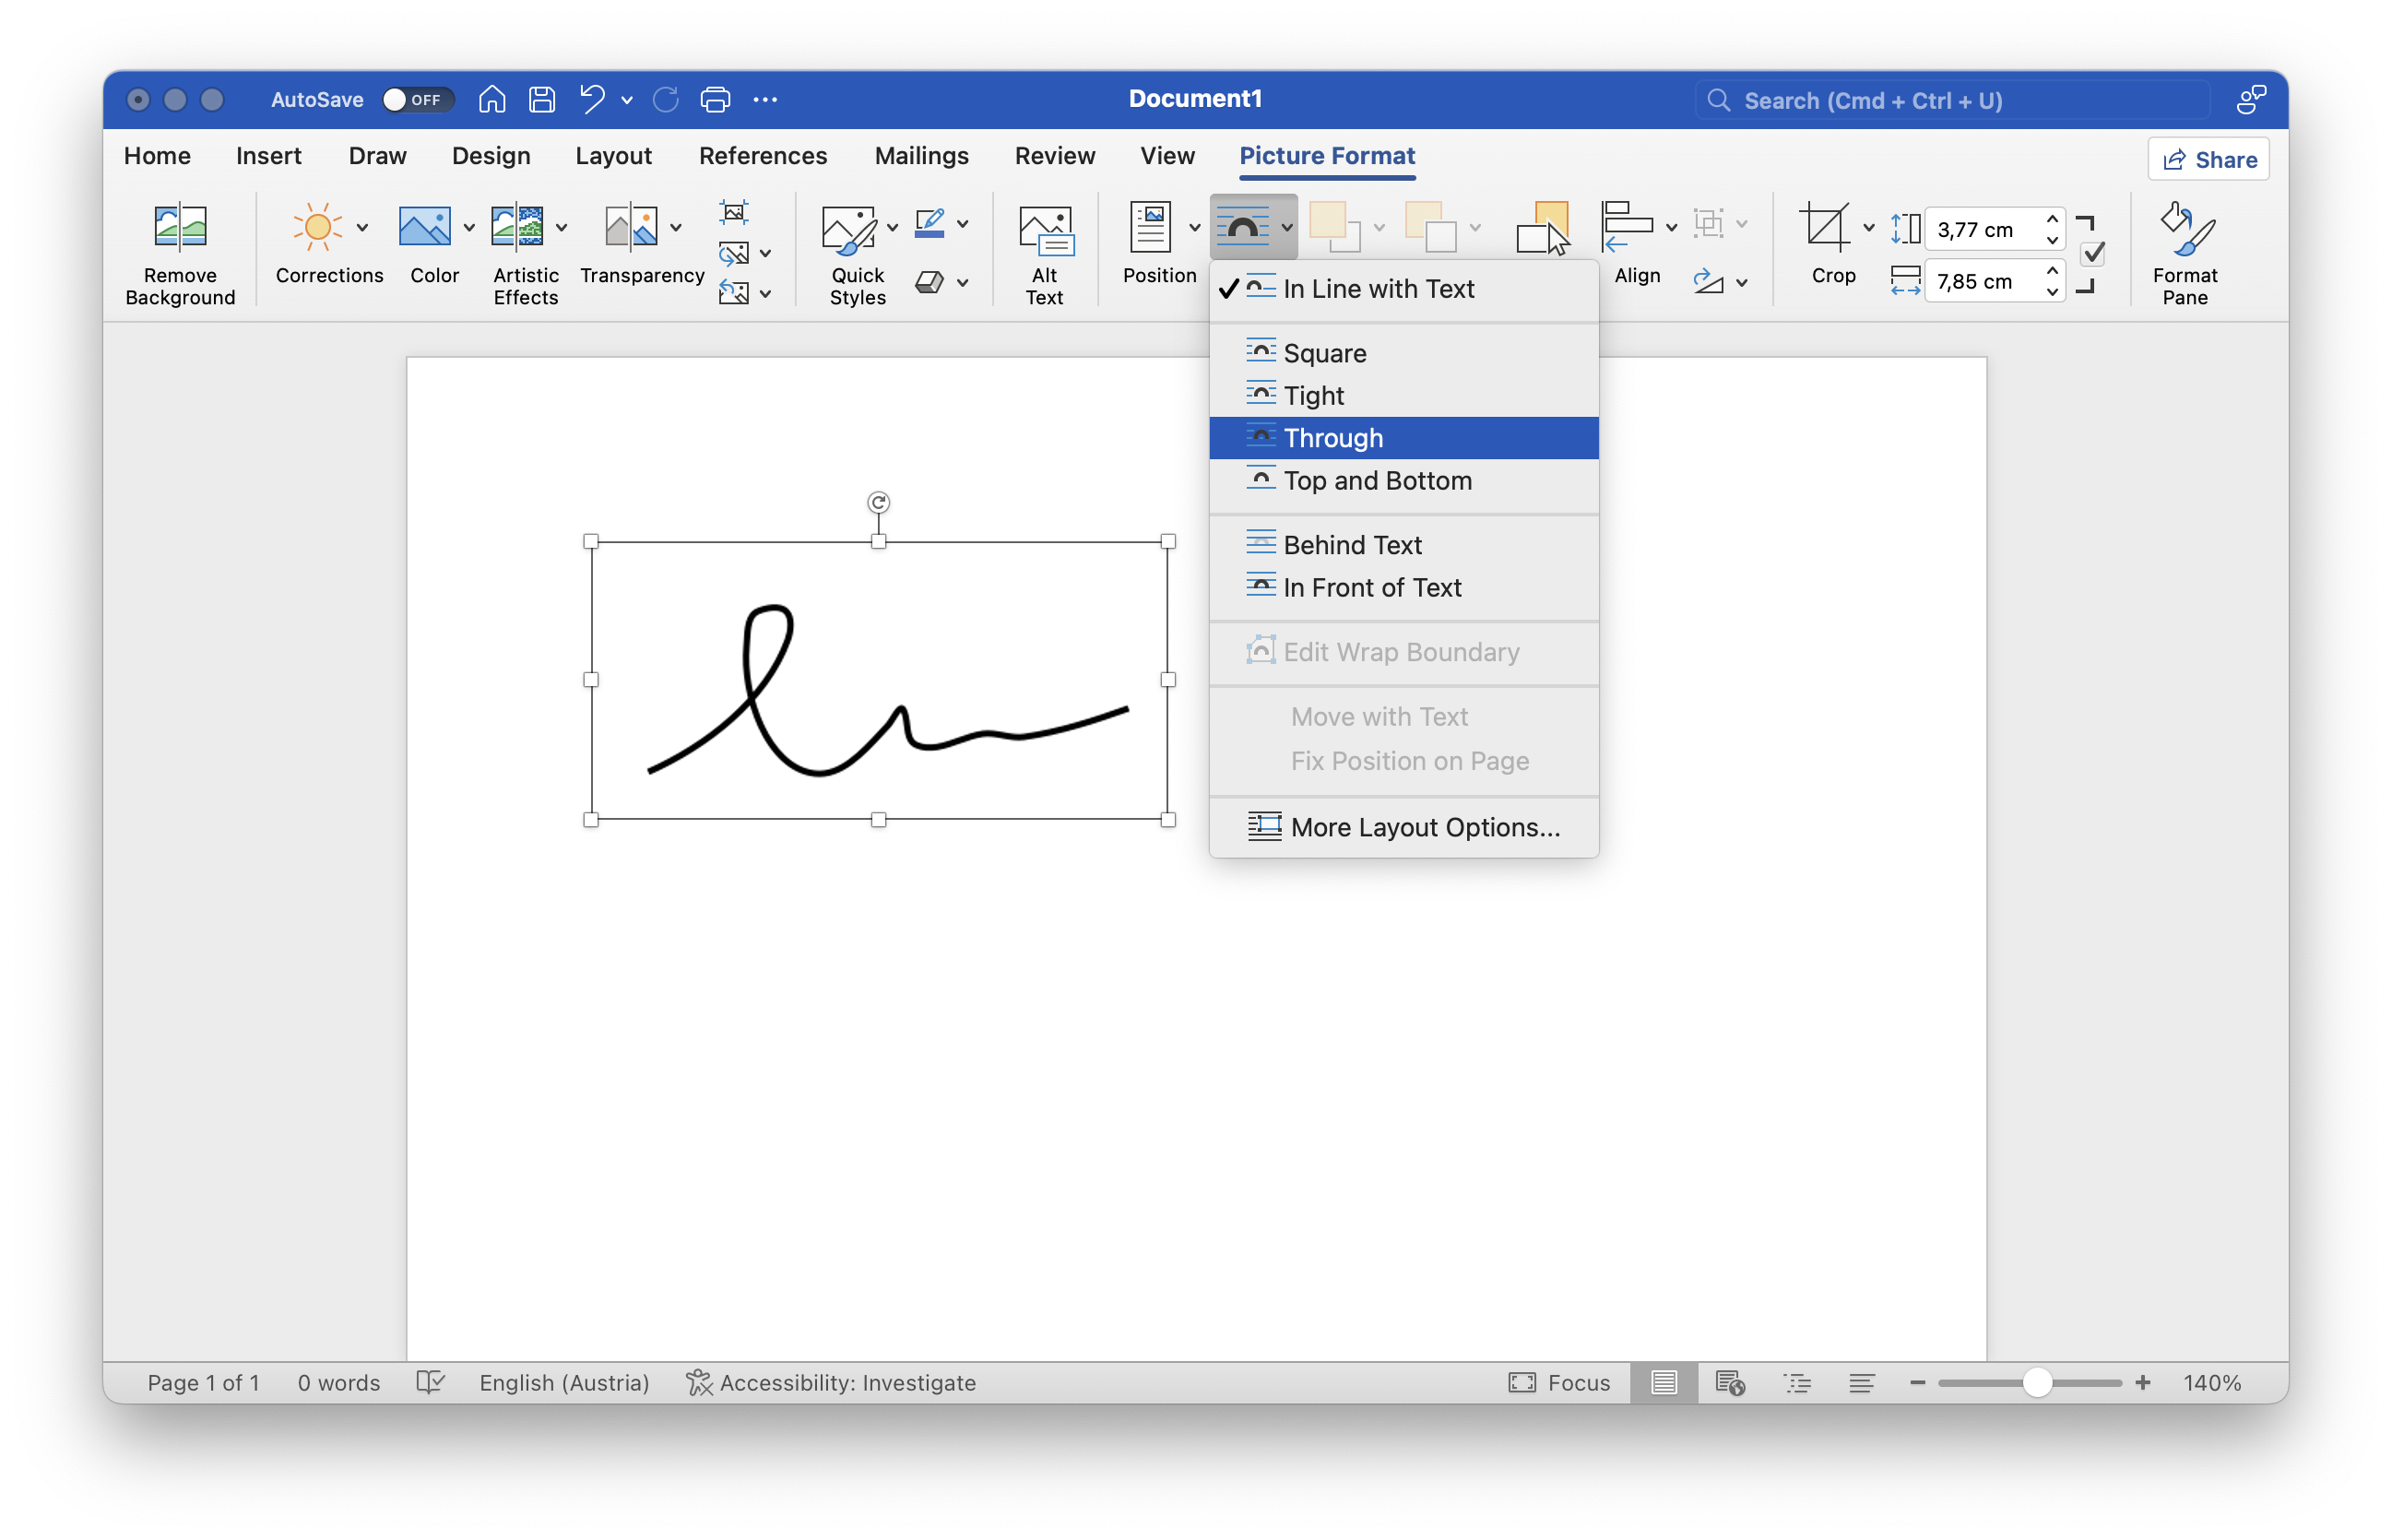
✨ Pro Tip: To move the signature image more easily through the text, click on the image on the page, go to “Picture Format” —> “Wrap text” —> and select “Through.”

Assessment
Adding an image of your wet signature is an easy way to sign a Microsoft Word document, however, it might not be the best option for important files, since it has some drawbacks.
Pros
- ✅ Easy to insert
- ✅ Reusable
Cons
- ❌ Lacks security measures
- ❌ Image may need to be resized or repositioned frequently
- ❌ Does not provide any means of verifying the authenticity of the signer.
📌 Remember: You can always convert your Word file to PDf and then electronically sign your PDF document which is much easier and more straightforward.
Method 4: Type Your Name Using Stylish Fonts (Easy, Basic)
Buide: Mac and Windows
- Go to “Insert” –> “Shapes” –> “Basic Shapes” –> “Text Box.”
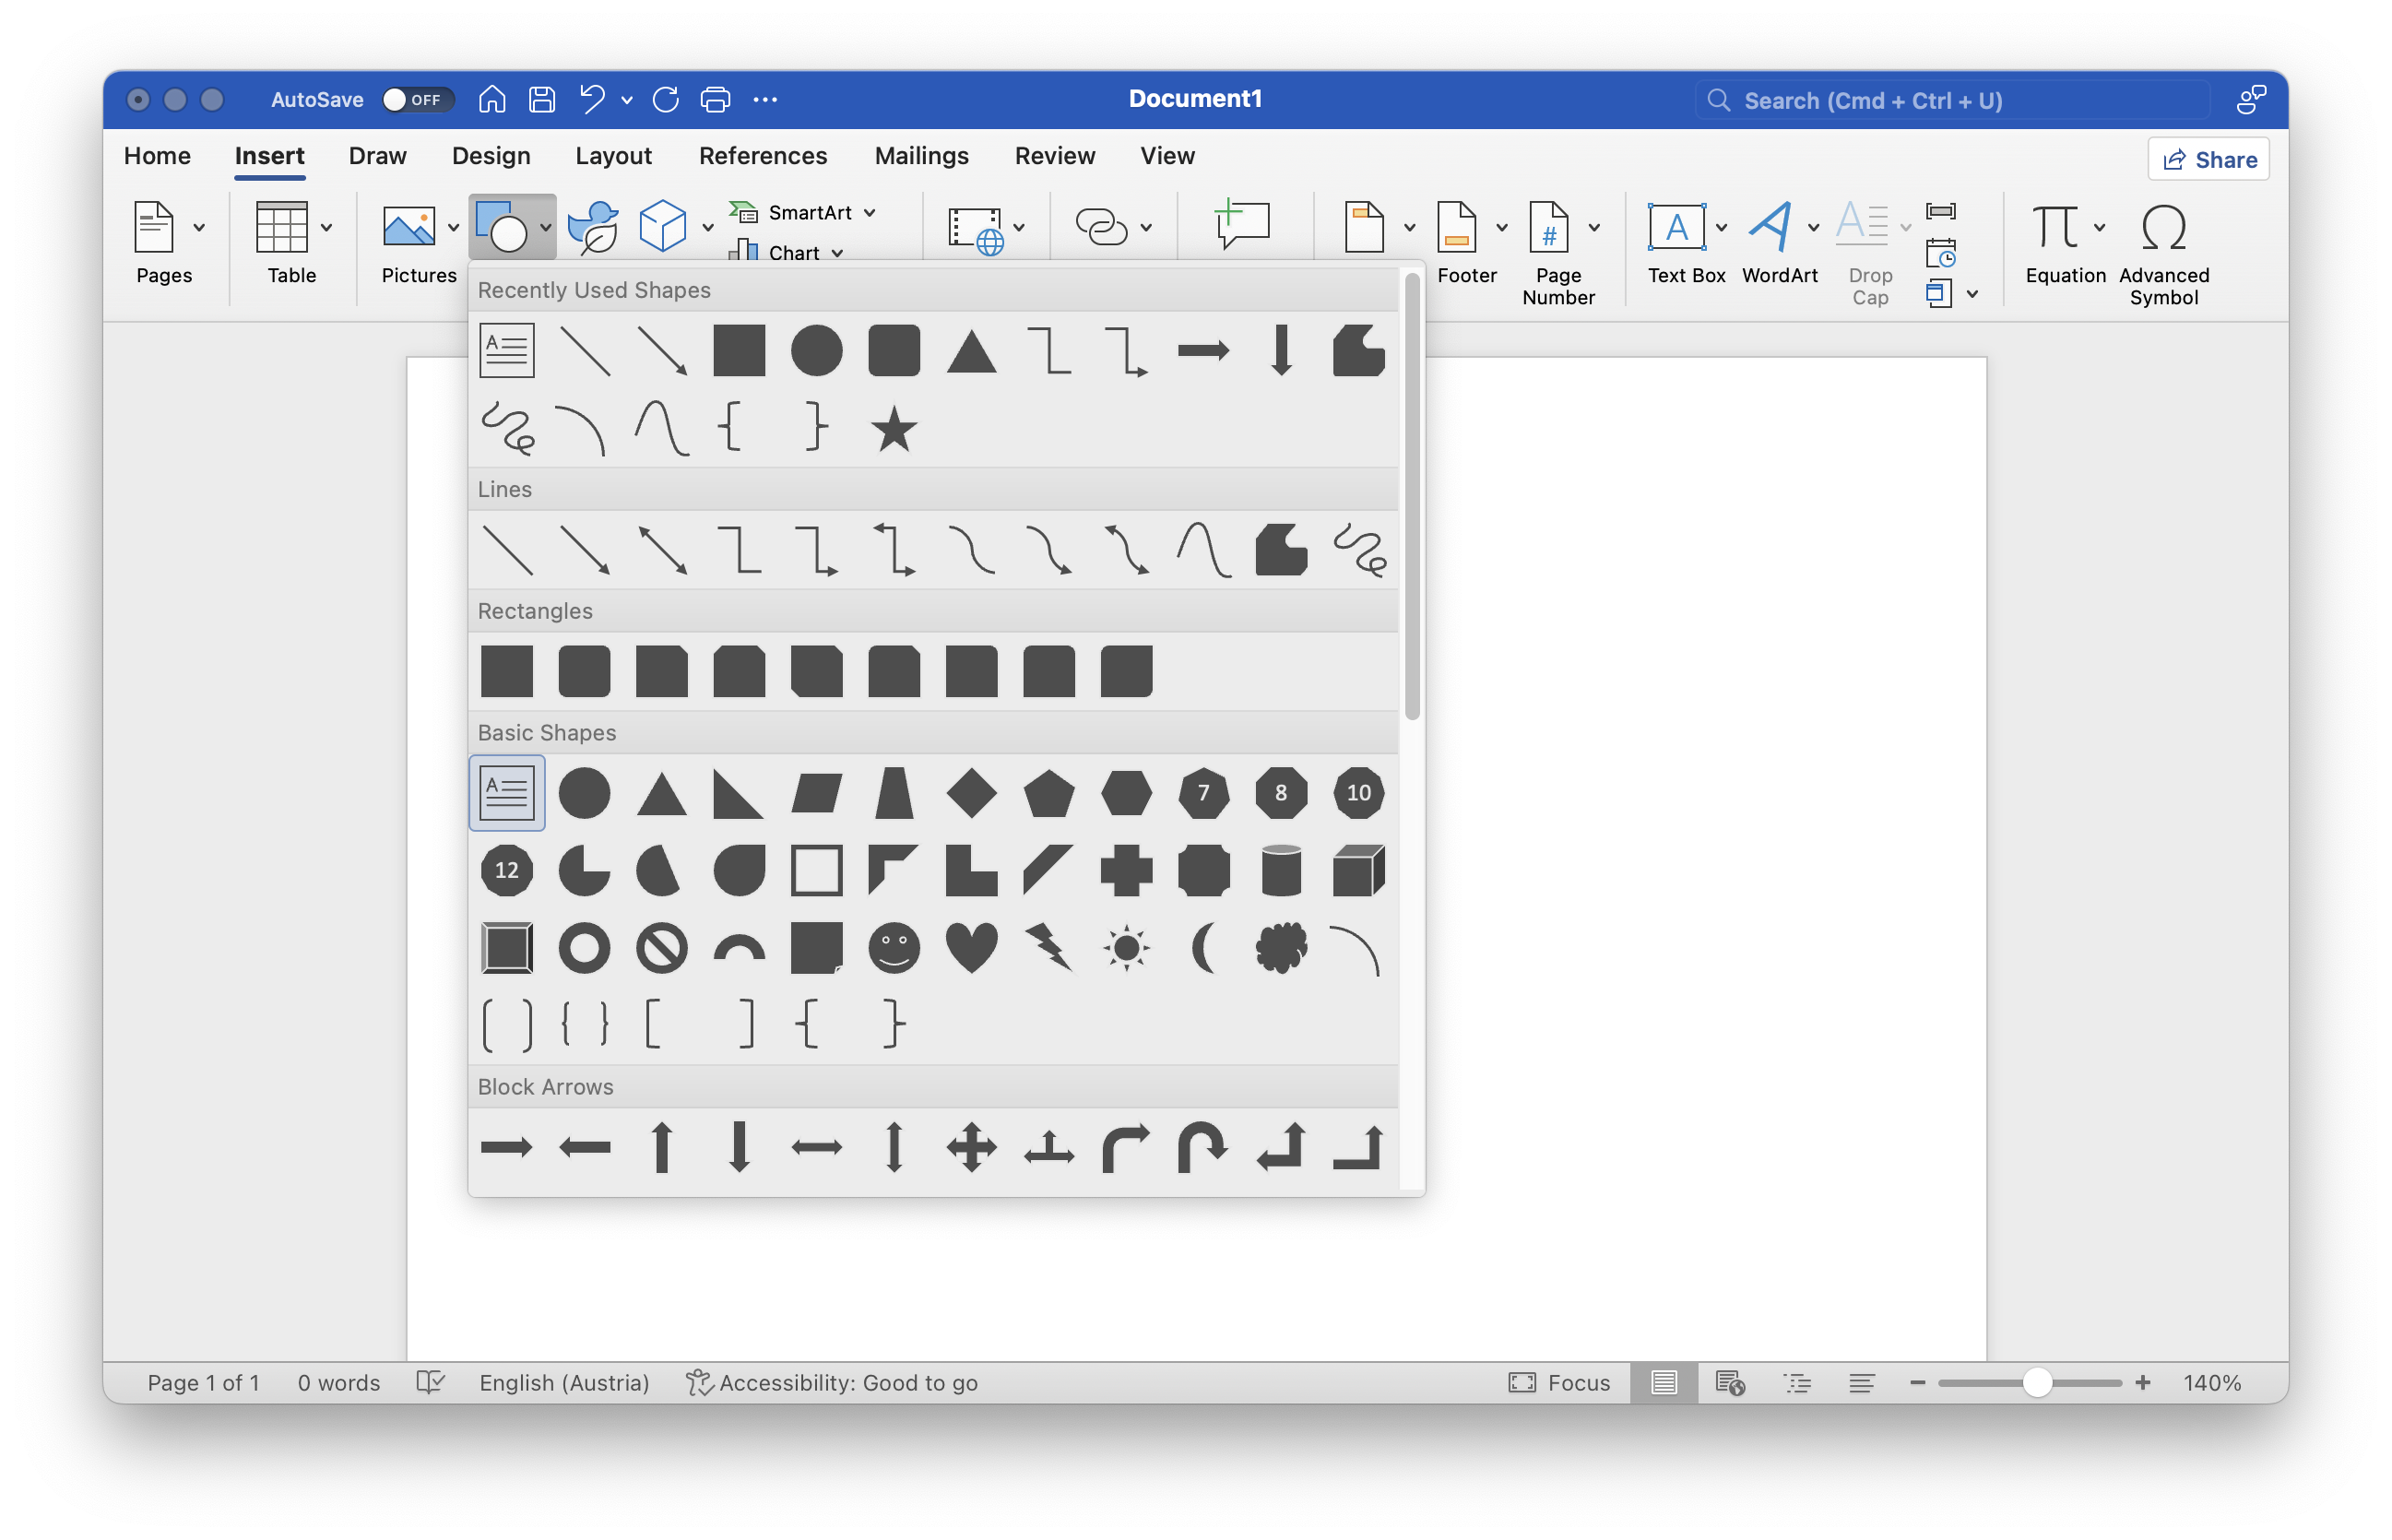

- Insert the Text Box in a place you want.
- Type your name and change the font as you wish.
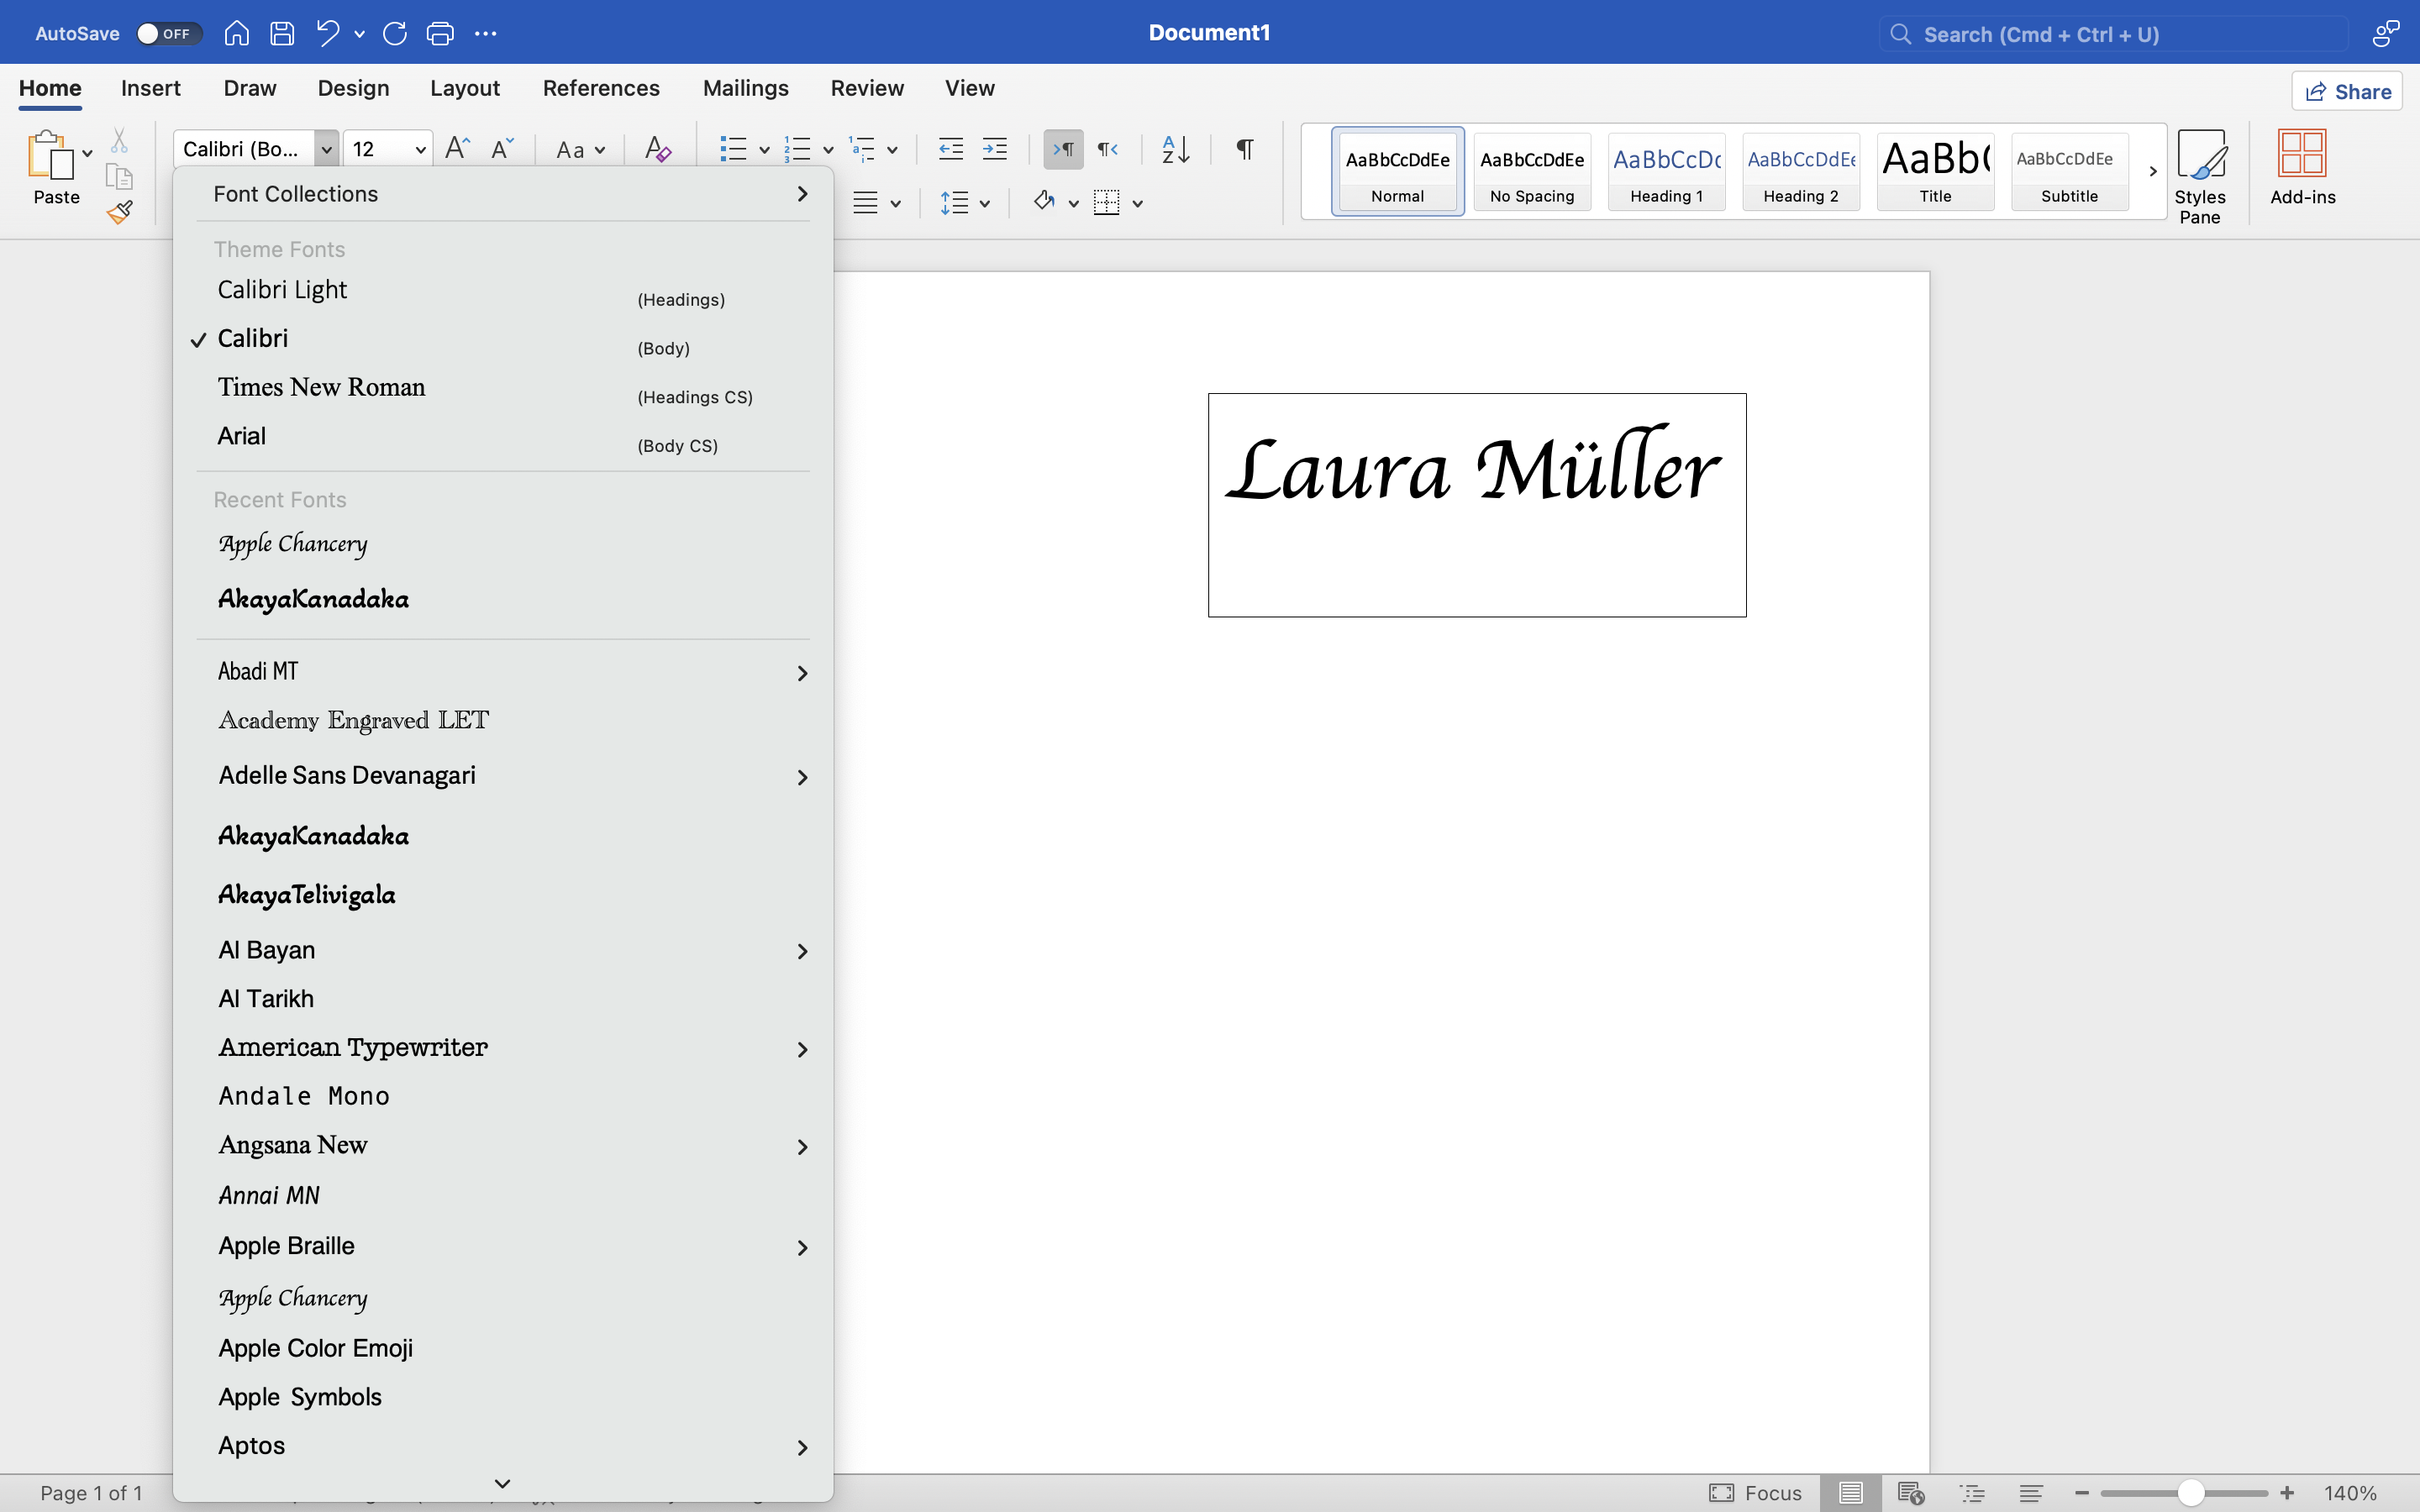

- Drag and drop the Text Box where you want the signature be.
Assessment
This method is very easy to use, however, it might not be secure. Here are some of the pros and cons of this method:
Pros
- ✅ Intuitive interface that simplifies the signing process.
- ✅ Highly secure platforms
- ✅ Ability to add Simple, Advanced, Qualified signatures
- ✅ Additional tools for contract management
- ✅ Legally binding signatures with compliance to eIDAS and other regulations.
- ✅ Reusing signatures
Cons
- ❌ Needs internet connection
Method 5: Using an eSignature Platform (Easy, Advanced)
Using a dedicated electronic signature platform is the best way to eSign a Word document. You can use an app like fynk to sign or insert your signature into your Word file.
Sign
any
Document in Less than
a Minute.
Guide
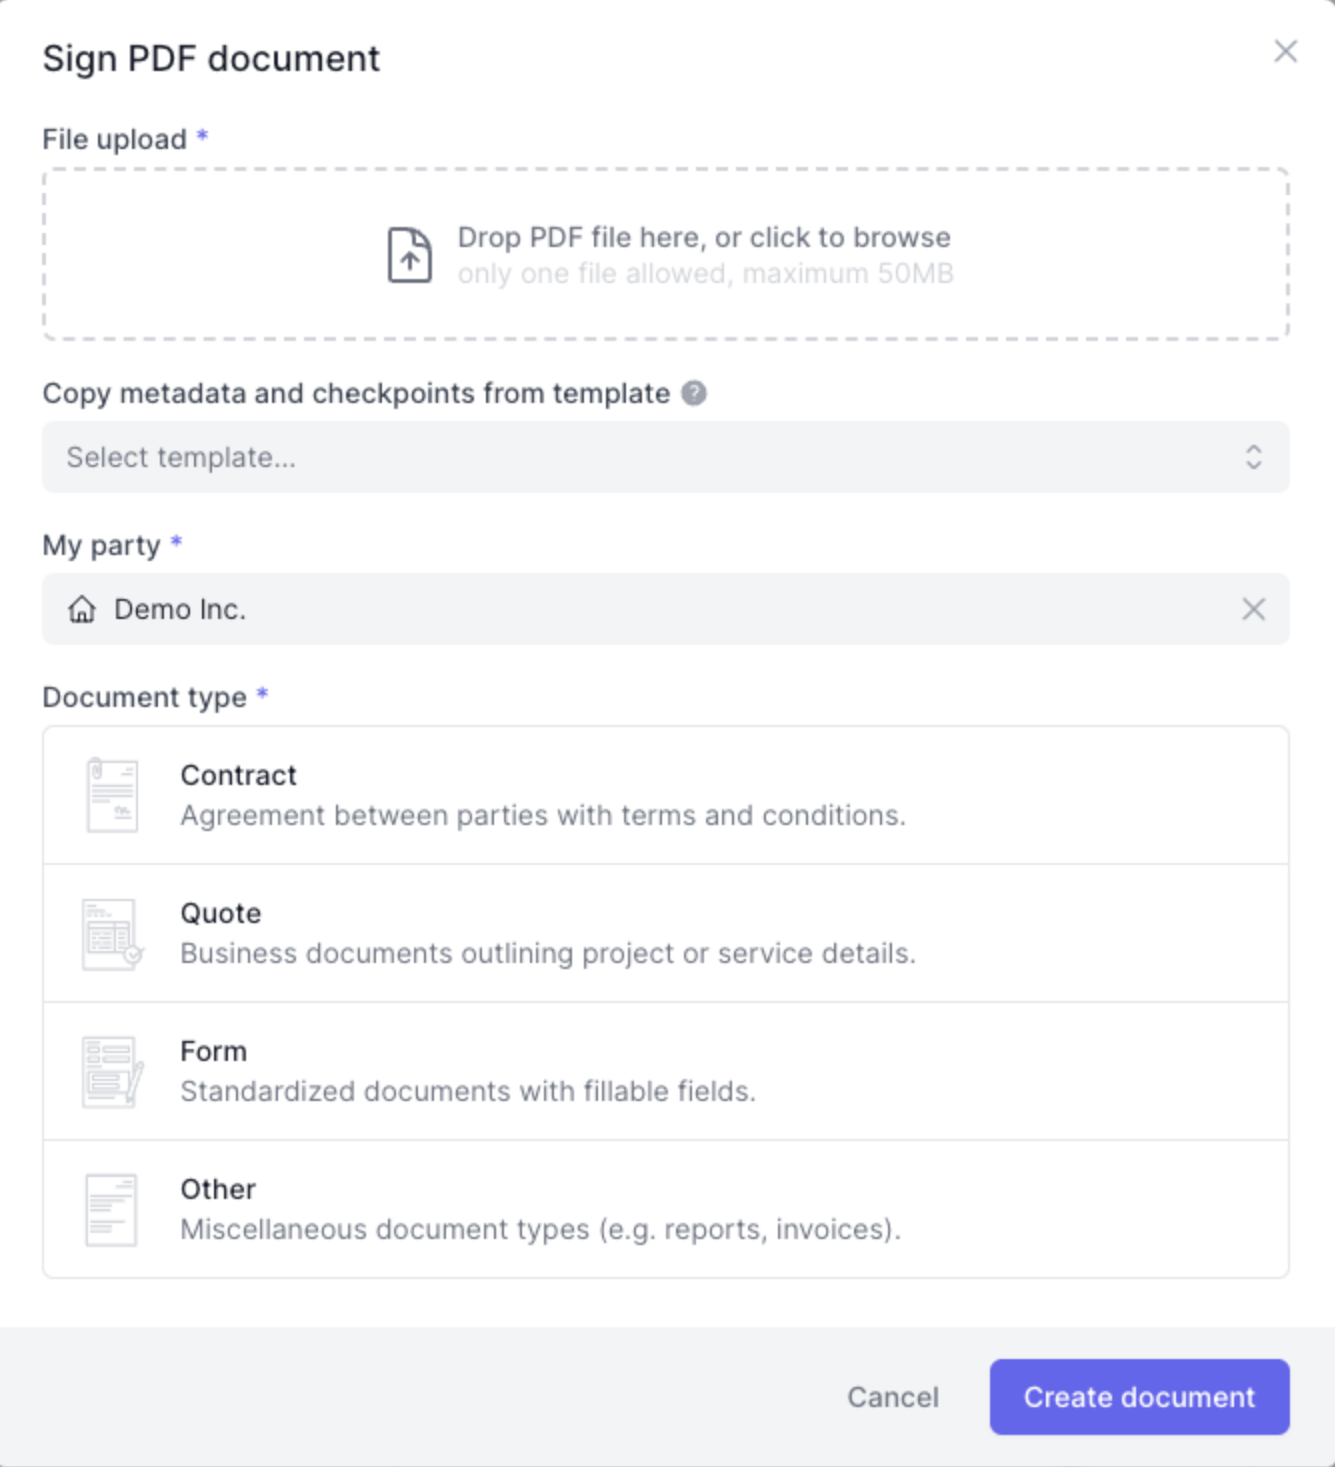
1. Upload the Word Document
You have two options to sign your Word document into fynk:
Option one: Convert your document to PDF and use “Sign PDF” button on the App.
Option two: Copy and paste your text into fynk’s powerful built-in editor.

2. Add Signers’ Email Addresses
After uploading your Word document, you’ll be prompted to add the email addresses of all signers.
If you are the only one who needs to sign the document, enter your email and skip to “Start Signing Now.”
3. Select the Type of Signature (Optional)
If advanced or qualified electronic signatures are required, go to the “General” tab and select the “Signature Type” you need.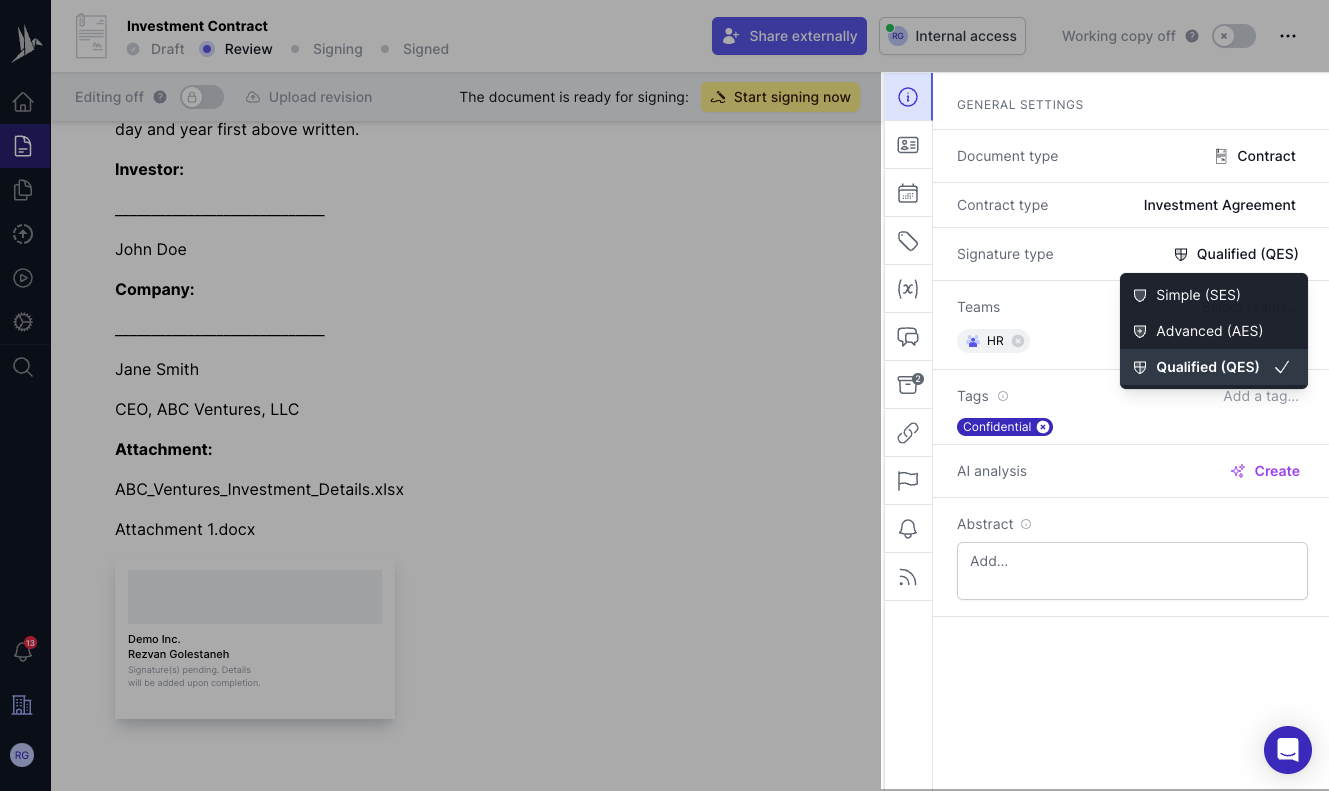
💡 Good to Know: Advanced Electronic Signatures (AES) and Qualified Electronic Signatures (QES) require ID verification as per EU regulation eIDAS. Learn more about them in our comprehensive Electronic Signature Guide.
4. Place Signature Fields in the Document and Sign
Drag and drop signature fields to the appropriate locations where each signer needs to sign.


Choose to type, draw, or upload your signature.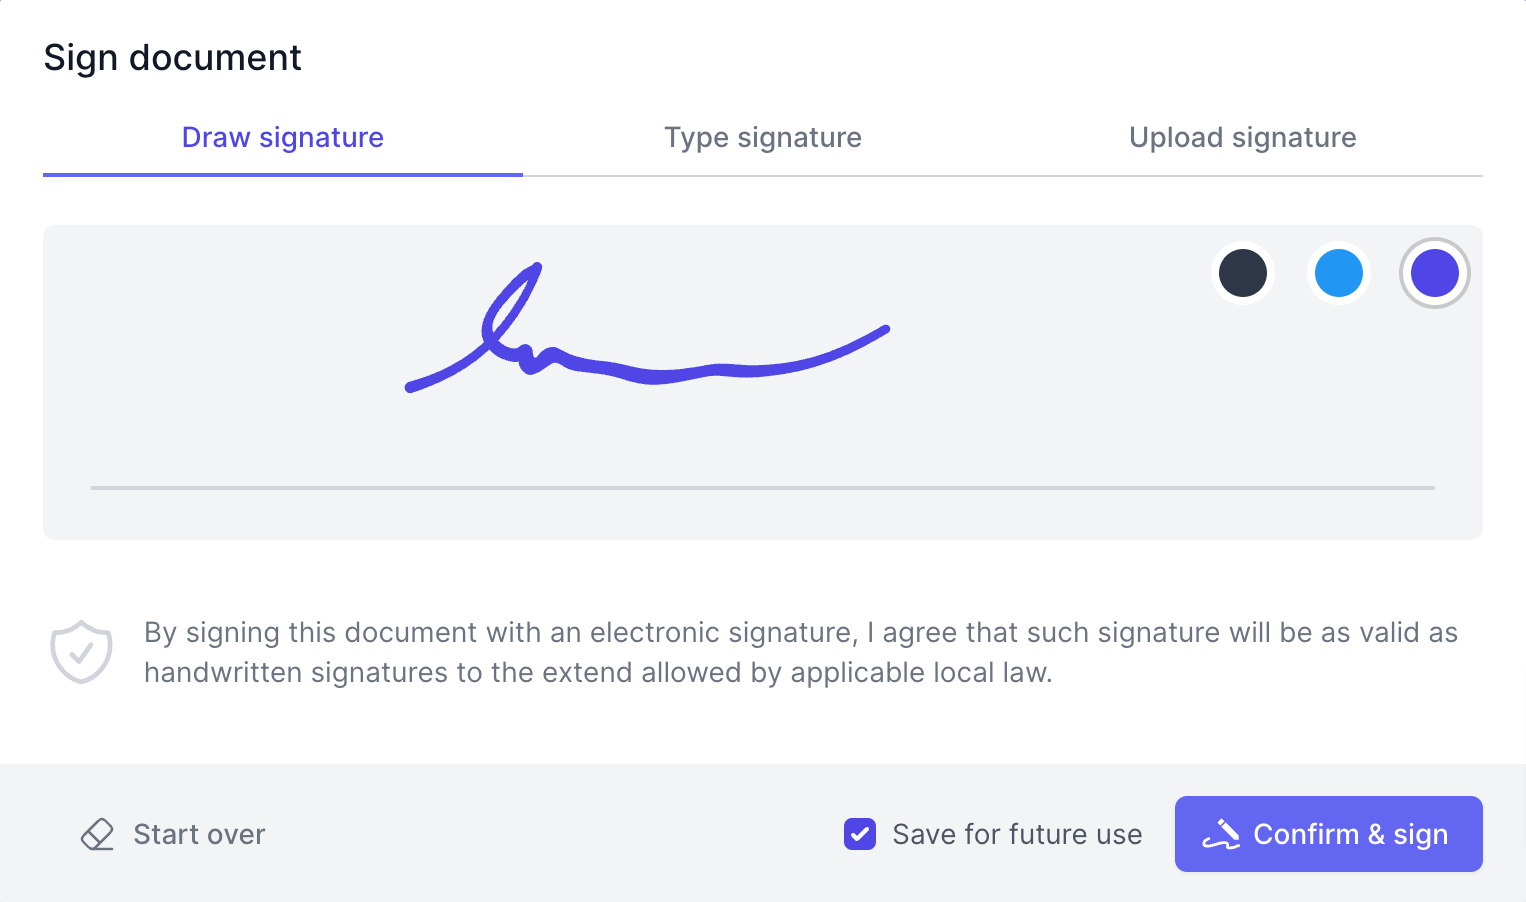
5. Send a Request for Signing (Optional)
If others need to sign, add their emails as signatories, place signature fields in the document, and click “Start Signing.”
fynk will automatically email the designated signers with instructions on how to review and sign the document electronically.
Assessment
Some additional benefits you’ll enjoy using a electronic signature platform like fynk are:
Pros
- ✅ Highly secure platform
- ✅ Legally binding signatures
- ✅ Additional contract management tools
- ✅ Ability to add Simple, Advanced, Qualified signatures
- ✅ Easily send out signature requests to multiple parties
- ✅ Intuitive interface that simplifies the signing process
- ✅ Negotiations and discussions directly within the document
- ✅ Store, organize, and manage all your signed documents in one place
- ✅ Monitor the status of your documents and receive real-time notifications
Now Over to You
While Word’s built-in features offer basic signing capabilities, they may not suffice for complex needs or strict legal environments. For higher security and compliance, especially in professional settings, try using an eSignature platform like fynk.

